How to Replace an Inspiron 15 XCMRD Battery?
Replacing an Inspiron 15 XCMRD Battery is a practical repair, but it deserves careful preparation. A swollen pack, sudden shutdowns, or less than one hour of runtime can indicate battery wear. Dell’s service guidance recommends shutting down the laptop, disconnecting the charger, and using compatible replacement parts. The exact connector and battery label still matter. Model names can overlap.
The broader battery industry also shows why replacement and disposal deserve attention. The Global E-waste Monitor reported 62 million tonnes of electronic waste in 2022. It projects that figure could reach 82 million tonnes by 2030. The International Energy Agency also identifies battery supply chains and material recovery as growing technical priorities. These reports do not measure the Inspiron 15 XCMRD Battery specifically. They provide useful context for responsible handling.
Battery University founder Isidor Buchmann explains that battery aging is shaped by chemistry, heat, time, and charging habits. That principle applies inside a warm laptop chassis. Before opening the computer, save files and photograph the cable position. A plastic pry tool is safer than a metal knife near the motherboard. Small details matter.
This guide will explain how to replace an Inspiron 15 XCMRD Battery, inspect the compartment, reconnect the cable, and test charging behavior. It will not promise perfect runtime. Battery quality, laptop age, firmware, and operating conditions can change the result. I have found that rushing the final connection creates avoidable problems. Take a breath. Check twice. Dispose of the old battery through an approved recycling channel.
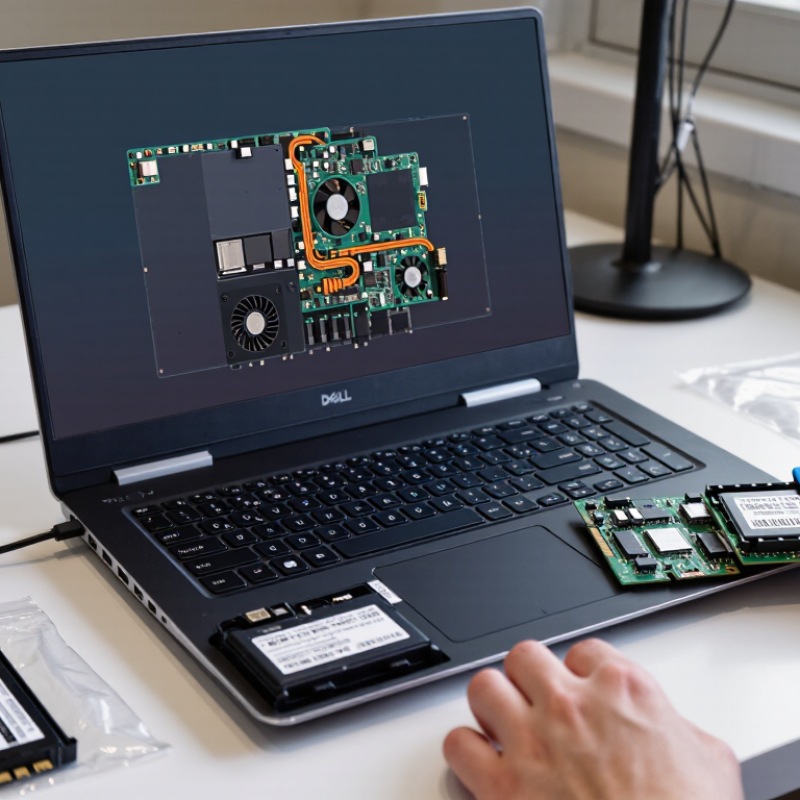
Identify the Correct Inspiron 15 XCMRD Battery and Required Tools
How to Replace an Inspiron 15 XCMRD Battery?
Choosing the correct Inspiron 15 XCMRD battery begins with the label, not appearance. Check the old pack for its part number, voltage, capacity, and connector position. A compatible replacement should match the listed voltage exactly. Its capacity may differ slightly, but never choose a higher voltage without verified technical guidance. Compare the battery shape with clear photographs before ordering. Small connector differences can stop the computer from starting.
Prepare a Phillips precision screwdriver, a plastic opening tool, and a clean, nonconductive work surface. A small container helps prevent lost screws. Shut down the laptop completely, disconnect the charger, and press the power button for several seconds. This reduces stored electrical charge. Avoid metal prying tools near the battery cells. They can damage insulation or create a dangerous short circuit. I once trusted a similar-looking battery and overlooked its connector angle. It fitted loosely, so the mistake became obvious only during testing. Measure twice.
Before removing the battery, photograph the cable routing and screw positions. Do not bend, puncture, crush, or heat the battery pack. If it looks swollen, stop handling it and seek qualified service. After installation, connect the cable firmly without forcing it. Check that no wire is trapped beneath the battery. Start the laptop, confirm charging, and observe unusual heat or odor. Battery readings can be inaccurate after replacement, so follow the computer’s approved calibration guidance rather than guessing.
Shut Down the Laptop and Prepare a Safe Workspace
Before replacing the battery in an Inspiron 15 XCMRD, shut the laptop down completely. Do not rely on sleep mode. Save your work, close every program, and disconnect the charger from the wall. Wait until the screen goes dark and the fans stop. Power matters. Remove nearby drinks, loose papers, and metal objects from the desk. A clean surface makes small screws easier to find. Use bright lighting and place a soft, nonconductive mat beneath the laptop.
Ground yourself before touching internal parts. An anti-static wrist strap is useful, but touching a grounded metal surface can also reduce static buildup. Keep a small container nearby for screws, and arrange them by location. Different screws may look similar but have different lengths. I once assumed matching screws were interchangeable; that assumption can damage a case or internal component. Slow down. Check the service guide for the exact battery layout before opening anything.
If the battery looks swollen, feels hot, leaks, or smells unusual, stop immediately and seek qualified repair support. Do not press, bend, or puncture it.
Work only after the laptop has cooled to room temperature. Keep children and pets away from the workspace. Disconnect all accessories, including memory cards and external drives. A phone photo of the closed device can help you remember cable placement later. Even careful preparation is not perfect, so pause whenever a step feels unclear.
Remove the Back Cover and Disconnect the Old Battery
Replacing a laptop battery starts with a calm, organized workspace. Shut down the computer completely and unplug the charger. Press the power button for ten seconds to release residual charge. Use a small Phillips screwdriver and a plastic opening tool. Avoid metal tools near the battery connector.
Remove every visible screw from the back cover. Keep them in a small tray, because several screws may have different lengths. Gently loosen the cover around the edges. Begin near a hinge and slide the plastic tool along the seam. Do not force a stubborn section.
I once overlooked a hidden screw, and the cover flexed more than it should have. After opening the panel, locate the battery cable. Pull its connector horizontally from the socket, using the cable head rather than the wires. Remove the battery screws, then lift the battery evenly. A swollen battery needs extra caution and should not be pressed or bent.
Tips: Photograph the internal layout before disconnecting anything. Check the replacement battery’s voltage, connector shape, and screw positions. Work on a clean, dry table. Ground yourself by touching an unpainted metal surface before handling internal parts. If the connector resists, stop and inspect its locking design. Guessing can damage the socket. The process feels simple, but small plastic clips break easily. Take your time.
Install the Replacement Battery and Reattach the Back Cover
Replacing the battery in a 15-inch laptop requires patience, especially when installing the new battery and closing the case. Shut down the computer completely, disconnect the charger, and hold the power button for ten seconds. Place the laptop on a clean, flat surface. Remove the back-cover screws and store them in a small container. Use a plastic opening tool, not a metal blade, to release the cover clips.
Lift the old battery connector straight from its socket. Do not pull the wires. Position the replacement battery in the same direction as the original. Secure it with the correct screws, then reconnect the cable firmly. Check that no wire crosses a screw hole or rests beneath the battery edge. I once rushed this step and had to reopen the cover. That small delay was avoidable. Before closing the case, inspect the connector and confirm that the battery lies flat.
Tips: Compare the screw lengths before installation. A long screw in the wrong hole can damage internal parts. Align the back cover with the ports and vents, then press around the edges until each clip clicks. Do not force a corner. If a gap remains, remove the cover and check for a trapped cable or misplaced screw. After reassembly, connect the charger and start the laptop. Verify that the battery is detected and charging normally. The first charge may take longer than expected.
The chart shows typical hands-on time for each stage of a laptop battery replacement. Power off the laptop, disconnect all power sources, handle the battery carefully, and test the system before fully tightening the back cover.
Power On the Laptop and Verify Battery Recognition and Charging
After installing the replacement battery, reconnect the internal cable firmly. Check that no wire is trapped beneath the battery edge. Refit the cover, connect the charger, and power on the laptop. A loose connector can imitate a failed battery.
Open the firmware setup or operating-system power screen. The battery should appear with a charge percentage, health status, and charging message. Watch the percentage for ten minutes. It should rise slowly, not remain frozen. A small charging indicator matters. I have seen users misdiagnose a good battery because they checked only the desktop icon. Restart once, then compare the reading again. If the battery is missing, shut down and reseat its connector. If charging stops near 80 percent, an adaptive charge setting may be active, rather than a hardware fault. Still, verify the setting before blaming the replacement. The Global E-waste Monitor 2024 recorded 62 million metric tons of electronic waste in 2022, with only 22.3 percent formally collected and recycled. Correct verification helps prevent unnecessary disposal. After recognition, allow one normal charge cycle, then test operation on battery power for fifteen minutes. Record unusual heat, rapid percentage drops, or unexpected shutdowns. Do not ignore them. These signs need careful inspection, not guesswork.
How to Replace an Inspiron 15 XCMRD Battery? - Power On the Laptop and Verify Battery Recognition and Charging
| Step | Action | Typical Data or Setting | Expected Result | Safety or Troubleshooting Check |
|---|---|---|---|---|
| 1 | Shut down the laptop, disconnect the AC adapter, and remove all external devices. | Power state: Off External power: Disconnected | The laptop is fully powered down before opening the enclosure. | Do not work on the battery while the laptop is on, asleep, or connected to mains power. |
| 2 | Remove the bottom-cover screws and carefully release the cover using a non-metallic pry tool. | Tool: Phillips screwdriver and plastic opening tool | The internal battery and connector are accessible without damaging the cover. | Keep screws organized by location and avoid using excessive force near clips or ports. |
| 3 | Disconnect the battery cable from the system board before removing the battery pack. | Connector: Multi-wire battery plug Connection: Fully seated and aligned | The old battery is electrically isolated from the laptop. | Pull the connector horizontally from its socket; do not pull on individual wires. |
| 4 | Remove the battery retaining screws and lift out the old battery. | Battery type: Rechargeable lithium-ion pack Rated voltage: Commonly about 11.1–11.4 V | The battery is removed without bending, puncturing, or stressing the pack. | Stop immediately if the battery is swollen, leaking, hot, or physically damaged. |
| 5 | Install the replacement battery in the same orientation and secure it with the original screws. | Battery position: Flat and aligned Fasteners: Tight, not over-tightened | The pack sits evenly with no movement or pressure on nearby components. | Use a compatible battery with matching connector, voltage range, physical dimensions, and approved specifications. |
| 6 | Reconnect the battery cable and inspect the connector before closing the cover. | Connector status: Fully inserted Pin alignment: Correct | The connector is secure and no wires are trapped under the battery or cover. | Never force a connector into the socket or reverse its orientation. |
| 7 | Reinstall the bottom cover and tighten the screws evenly. | Cover fit: Flush with chassis Screw condition: Secure and undamaged | The enclosure closes without gaps, bending, or unusual pressure. | Do not operate the laptop with loose screws or an improperly seated cover. |
| 8 | Connect the AC adapter and press the power button. | Input power: Compatible AC adapter Initial charge: Recommended before extended use | The laptop starts normally and reaches the operating-system login screen. | If there is no response, disconnect external devices and recheck the battery connector and adapter connection. |
| 9 | Check whether the operating system recognizes the replacement battery. | Battery status: Present Charge level: Displayed as a percentage | The system shows a battery icon, charge percentage, and charging or plugged-in status. | A missing battery icon may indicate a loose connector, incompatible pack, or firmware and driver issue. |
| 10 | Verify charging and monitor the battery for several minutes. | Charging status: Charging Battery temperature: Normal to mildly warm Charge increase: Approximately 1–5% within several minutes, depending on capacity and usage | The charge percentage gradually increases and no warning message appears. | Unplug the adapter if the battery becomes unusually hot, swells, emits an odor, or displays an error. |
| 11 | Confirm the battery health information using the system power settings or a battery report. | Key readings: Design capacity, full-charge capacity, cycle count, and health status | The replacement battery reports readable capacity data without an “unknown” or “not detected” condition. | A small difference between design capacity and full-charge capacity is normal for a new battery. |
| 12 | Complete one normal charge-and-discharge cycle after installation. | Recommended practice: Charge fully, then use normally until a low-battery warning appears | The percentage reading becomes more consistent and runtime can be evaluated under normal use. | Avoid repeatedly draining a lithium-ion battery to 0%; normal partial charging is acceptable. |
Contact Details
Address:
Solar Pump Solutions,
Borrisokane, Co. Tipperary, Ireland.
